Wednesday, 12 October 2016

Review: Maybelline Vivid Matte Liquid Lipstick

Hey Gorgeous People!

So I had a free little section after finishing some English study that I thought I may as well use to finally focus on you guys and just giving you some more content that we both enjoy!
A few weeks ago, I was on the hunt for some cheap liquid to matte lipsticks just from the local pharmacy that could just be a nice extension to my lipstick range. And I stumbled upon these! Now these two were the only two colours that I really enjoyed from the range. I got Rebel Red and Nude Thrill ( they also come in Berry Boost, Electric Pink, Nude Flush, Fuchsia Ecstasy, Orange Shot, Possessed Plum, Pink Charge and Vivid Violet). They didn't have the whole range at the pharmacy so I was left with very little choice and so these two were my top picks.

Time for my thoughts on this product then!
First of all, I absolutely adore these two colours! They are just really pigmented and are exactly as the name says - VIVID! They aren't streaky and application is just super easy. The packaging is simple which I have no problems with; they do look quite nice in my makeup shelves. The red is a really beautiful blue-based red so it makes your teeth look really white, and the nude is just a beautiful tone which is so gorgeous especially if you are doing a more natural or sepia-toned makeup.

However, while I love the two colours, there are some downsides about this product that just left me underwhelmed and a bit frustrated during the application process. The packaging says its going to be a matte lipstick so, naturally, that is what I expected. But no ... for it to be matte, you have to wipe off as much product from the applicator as possible, which leaves a sticky mess that eventually works its way down the thread of the lid as you can see in the Nude Thrill bottle in the photo. So you get too much product which is a hassle to get back into the bottle. I've had to start using a lip brush to get a small amount off the actual applicator and I just ... get a little irritated. Also, while the initial application of Nude Thrill is really nice, once you get the right amount of product, after about 5-10 minutes I've noticed that it settles in the wrinkles of my lips and I just have to keep reapplying throughout the day.

Another downside to this product is that, because it's not a lip stain or like other liquid lipsticks that I have tried, as soon as you drink or eat, you are left with only the very outer line of your lipstick remaining. So if you wear this product be prepared to be hungry and thirsty unless you are prepared to reapply so many times.

I really liked this product at the start, and I know it's not a high-end brand but I did expect a bit more of a mattifying quality to product so .... this is just a let down. I'll probably continue wearing the Rebel Red because its not as bad as Nude Thrill.


(I know I'm breaking out, sorry it's so gross but it's from the HSC stress)
You can't see the Nude Thrill sinking into my lip wrinkles because this was taken right after application.

I hope this was useful, don't knock off the product till you try it though because it could just be the way I applied the product or the condition of my lips!

Don't forget to follow me on:
Twitter: @immyminette
Snapchat: immy-12
Gmail: immyminette.official@gmail.com
Facebook: Immy Minette
Google+: (link on side of page)

Bloglovin': (link on side of page)

Love you all,

Stay Positive xoxo

Immy Minette


Tuesday, 11 October 2016

Life Update: Education!

Hey Gorgeous People,

So I thought I would just post this quick life update because I have so much going on and I had a few minutes free, so I thought I would share it with all you lovely people!

Yes ... I know I haven't posted something beauty related in a very long time but it has been my HSC year and it has been so hectic and stressful. Right now I am two days away from my first HSC exam for English and, while I feel pretty confident and chill about it all, I am also really scared that I own't get a good enough ATAR to be pleased with myself and the effort I have put into this last year of my schooling.

My trials were a term ago and while I didn't fail in them, I know I can now improve on my marks and get better in my HSC. So it was a good learning curve and I understood that I was really going to have to focus and study my little butt off! My marks were as follows for Trial Examinations:
English Advanced - 67%
General Mathematics - 79%
Modern History - 71% (I am really happy with that because I thought I was going to fail :D )
Ancient History - 75%
Food Technology - 77%
Community and Family Studies - 92% (Top Of The Class!!)

Also, I have applied for university for a Bachelor of Communication and I'm going to major in journalism. I talked to my parents and family and they helped me realise that, while I love ancient history, there wasn't any jobs for me without having to leave Australia and I'm not prepared to leave Australia that soon! And with journalism, I can focus on so many different subjects instead of being so niched, so that's a big bonus.

If any of you have big life updates that you just want to tell someone, I am always here! So comment below if you have any news because I am so excited to hear from you.

Love you all so much,

Stay beautiful xoxo

Immy Minette

Tuesday, 29 March 2016

I Am So Sorry

Hey Gorgeous People,

I think I owe you all a massive explanation about my lack of posting over the last couple of months. As you may or may not know I am currently participating in HSC!!

I am super stressed and anyspare time that I may have is spent studyung and summarising as much work as I can. I apologise for it though because I promised posts and haven't been able to keep it :( I will be getting this up and running after I finish though and I will tell you all about my trip to Cambodia (if I get enough money to go) and all other fun content!

Also, next year, I have something fun and exciting to announce so I cannot wait till 1st January 2017!!

Thank you so much for supporting throughout my time on here and I am so excited to start again soon (sort of)!!

Love you all,

Stay Positive xoxo

Immy Minette

Monday, 21 December 2015

Christmas Conundrums 2015: Pt 2 - Elfing About?


Hey Gorgeous People,

I decided to do a Christmas-y/Elf type makeup just for the fun of it!

And here it is!


So the products above are what I used for my face base:
1. e.l.f Tone Adjusting Primer
2. Maybelline FitMe Foundation 115
3. MAC Pro Longwear Concealer
4. e.l.f High Shimmer Powder
5. Savvy Pressed Powder
6. Brushes -> Real Techniques (buff, contour, foundation, detailer), beauty blender, ecotools blush and powder, and e.l.f powder puff.

Above is then the process of baking my face! This is done after your foundation and you apply highlighter or a light concealer in a triangle beneath your eyes, in a triangle on your forehead, on your chin, and a thin line down your nose. You then apply generous amounts of loose powder (very light) on these areas and let it "bake" for around 10 minutes. You then lightly brush, in short quick strokes, the powder away.     


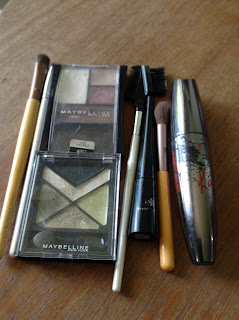
For my eyebrows, I used my e.l.f concealer brush (I only ever use it for my eyebrows) and the chocolate matte Maybelline eyeshadow.
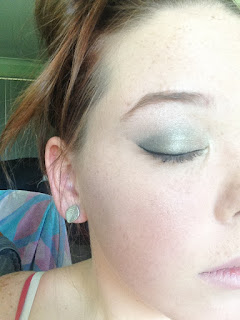
For my eyes, I did a smokey eye using the green Maybelline New York palette above, blending it up to my brow bone and highlighting the inner corner of eye. I used sticky tape to create a sharp definition and to make the winged eyeliner so much easier to apply! After removing the tape you will need to gently apply more powder to your face as it can pull away your makeup.


Finally, for my lips I used a simple red lip gloss/stain from my Andy Warhol palette! And the look is complete!

 Thank you all so much for your support throughout the year and I hope you have a very merry Christmas/Hanukkah/End Of Years/whatever you celebrate!

Don't forget to follow me on:
Twitter: @immyminette
Snapchat: immy-12
Gmail: immyminette.official@gmail.com
Facebook: Immy Minette
Google+: (link on side of page)
Bloglovin': (link on side of page)

Love you all,

Stay Positive xoxo

Immy Minette

Christmas Conundrums 2015: Pt 1 - Product Review

Hey Gorgeous People,

I am so sorry for the hiatus but I am back and ready to roll!!

Seeing as its Christmas I thought I might do some Christmas themed posts for y'all starting with some early presents that I bought myself!!

1. Real Techniques Brush Set w/ Case


I have heard wonderful things about this brand of makeup brushes and they did not disappoint!! They are so soft and create a truly flawless finish. The foundation brush also doesn't leave my foundation streaky which was a problem with my e.l.f brush as my old brush just was a bit too stiff but the Real Techniques Foundation Brush just creates a airbrush effect and I love it! I got this set on sale for only $38 so I thought it was a bargain after seeing what that they are priced as around $20 a brush usually.


 2. e.l.f Tone Adjusting Face Primer


Compared to my previous primer, this primer is so amazing! It applies really smoothly and easily and really holds the makeup and keeps it from slipping off my face. However, I don't think my face is excessively red and the only real redness is from blemishes, and it just didn't reduce the redness as much as I would have liked but all-in-all it is a wonderful product and I am so proud of it.

3. Beauty Blender


What else can I say about this product other than it blends really well and does its job! I love the colour of it as well and I can't wait to use it more often!

You will definitely see all these products in upcoming makeup posts so keep your eyes peeled and tell me what early Christmas presents you bought yourself in the comment section below!

Don't forget to follow me on:
Twitter: @immyminette
Snapchat: immy-12
Gmail: immyminette.official@gmail.com
Facebook: Immy Minette
Google+: (link on side of page)
Bloglovin': (link on side of page)

Love you all,

Stay Positive xoxo

Immy Minette


Friday, 30 October 2015

Halloween Makeup 2015: Pt 2 A Little Mermaid


Hey Gorgeous People,

So as you know, I am doing a few makeup looks/tutorials in preparation for the upcoming event ... Halloween!! Yes, I know I am Australian. Yes, I know Australians don't celebrate Halloween. But this is mainly an excuse for me to test out Halloween makeup looks for the sheer fun of it! So below I am gonna show you what I used and how I achieved the above mermaid look! Enjoy!

Products:


1. Base
So I moisturised my face with the Simple Light Moisturiser and applied my K-Mart Primer. Then, with my beauty blender, I applied my Maybelline FitMe Foundation in 115 over my face and slightly down my neck to ensure it was properly blended. I then applied MAC Long Lasting Pro-wear Concealer beneath my eyes in a low V, around my nose, on my chine, and in the centre of forehead and down towards between my eyebrows. Then, using my e.l.f shimmer highlighter palette, I highlighted my brow bone, cheek bones, and down the centre of my nose with myEcoTools Concealer Brush. I then set my face with my Savvy Pressed Powder with my EcoTools Powder Brush. (BTW I took closeups of the eye makeup after the initial trial as I forgot to take photos ... sorry). I then applied e.l.f Sunkissed Bronzer with my EcoTools Powder Brush.

2. Eyeshadow
This specific  Andy Warhol palette doesn't have names so I numbered them! I first outlined my crease and the outer V of my eye and down into the inner corner of my eye with colour 1. I then patted colour 2 along my eyelid, making sure that my entire lid is covered. I then blended in number 3 up towards my eyebrow and darkened my crease with the same colour. I then blended Frost from the Glamazon palette with number 3 from the Andy Warhol palette on my brown bone.


I then filled in my eyebrows with the blue eyeliner from the Pop Fusion palette to create blue, mermaid-like brows! Mascara, Kate by Maybelline, was applied in a few coats to make them long and thick. I then got my Master Graphic Eyeliner Pen by Maybelline and drew a simple cat eye and then a reversed cat eye on my lower lash line to create the illusion of a fish around my eye.

Scales:
To make the scale i used my e.l.f white eyeliner with the colours Spear from the Glamazon palette and number 1 from the Andy Warhol palette. I drew a variety of different scale patterns along my face and then dabbed on different combinations of Spear and colour number 1 on top to make the scales stand out. PRETTY SIMPLE!!

Lips
Okay, so the lips ... I didn't use lipstick and there is a lot of apply powder, apply more powder, blend, apply. So you get a clear lipgloss of lipbalm and apply it to your lips. I then patted my lips with Spear from the Glamazong palette until my lips were sufficiently ... blue! I then carefully blended number 3 from the Andy Warhol palette in the outer corner of my mouth and along my cupids bow. If you want to further highlight your lips you can blend a colour like number 3 or 2 from the Andy Warhol palette as lipliner but I didn't feel like I needed to.

And there you have it!! My second Halloween inspired post! 

I know this is super late but I have just been so caught up with the beginning of Year 12 and the loads of homework so hopefully I can maintain regular posts.

I would love to see you Halloween costume in the comments below and I might try recreate some of them for next year!

Thank you so much for reading this, I really appreciate your support xx

Don't forget to follow me on:
Twitter: @immyminette
Snapchat: immy-12
Gmail: immyminette.official@gmail.com
Facebook: Immy Minette
Google+: (link on side of page)
Bloglovin': (link on side of page)

Love you all,

Stay Positive xoxo

Immy Minette


Halloween Makeup Pt 3: Pop Art Damsel

 Hey Gorgeous People,

Yes, it's my third attempt at an easy Halloween makeup idea for you all and I am absolutely loving pretending that Australia celebrates this awesome holiday!

So today I wanted to do something I have been dying to try for months now ever since I saw people doing this on Pinterest ... and that thing is Pop Art. This makeup is channeling your inner comic book page and I am turning myself into a damsel in distress. I didn't include the tears because i knew I didn't have the right shade of blue body paint and I didn't want to mess up the end result. So here goes!!


 1. I just did my usual base (after using my Simple light Moisturiser and Clinique Toner) with K-Mart Primer, Maybelline FitMe Foundation (115), MAC Concealer, e.l.f facial whip, e.l.f Shimmer Palette, Savvy Pressed Powder, and e.l.f Sunkissed Bronzer (pictures below).


2. I then moved on to framing my face with my liquid eyeliner, Master Graphic by Maybelline, by drawing a relatively thick line about half a centimetre away from my hairline, down the centre of my nose - curving around on one side to the top of my nostril - beneath my cheekbones and along my jawline. I also outlined my eyebrows and made two curved "wrinkles" to make the distressed look of the damsel in distress. I then outlined the top of my crease of my eye, down the outer corner of my eye and along my lash line with e.l.f liquid eyeliner. my lips were outlined with the Master Graphic Eyeliner Pen by Maybelline as long as some shading up from my cupid's bow to my nose.


3. I then shaded in the section of my eyelid with purple shade in the Essence Quattro Eyeshadow Palette "Purple Day" with my e.l.f eyeshadow brush. This eyeshadow was so great for this look as it was bright and really popped! I also got my MAC Russian Red lipstick and filled in my lips (yes I forgot to add a square of highlight on my lips but you should definitely do that for a better effect).


4. I then used my Kate Mascara by Maybelline and also lined my lower lashline with my e.l.f black pencil eyeliner. I also got Black Global Colours Body Art Body Paint and filled in my eyebrows with a small paintbrush to make sure it was neat. This step really accentuates how uneven my eyebrows are ... euch!

5. Then came the dots ... I used White Global Colours Body Art Body Paint and the end of a small paint brush and just started dabbing dots on my face in diagonal lines. This step is a long process of going over dots and wanting to give up but keep going because it looks pretty good at the end.

And there you have it!! Pop Art Damsel Halloween Makeup! No just throw on a nice 1950s style dress and you are good to go.


Don't forget to follow me on:
Twitter: @immyminette
Snapchat: immy-12
Gmail: immyminette.official@gmail.com
Facebook: Immy Minette
Google+: (link on side of page)

Bloglovin': (link on side of page)


Love you all,

Stay Positive xoxo

Immy Minette
Related Posts Plugin for WordPress, Blogger...